

Alesis SR-18 Drum Machine: A Comprehensive Guide
Delve into the world of rhythmic possibilities! This guide unlocks the SR-18’s potential, offering detailed instructions for crafting compelling beats and sonic textures․
The Alesis SR-18 is a classic, affordable drum machine renowned for its robust sound library and intuitive workflow․ Released in the late 1980s, it quickly became a staple in home studios and amongst musicians seeking a versatile rhythmic foundation․
This drum machine offers a wide range of sounds, from realistic acoustic kits to punchy electronic percussion, making it suitable for various genres – pop, rock, hip-hop, and more․ Despite its age, the SR-18 remains highly sought after due to its simplicity and powerful features․
This guide aims to provide a comprehensive overview of the SR-18, covering everything from initial setup to advanced programming techniques, ensuring both beginners and experienced users can harness its full creative potential․ Prepare to explore a world of rhythmic possibilities!
What’s Included in the SR-18 Package?
Typically, a complete Alesis SR-18 package includes the drum machine itself, a power adapter (often a standard wall-wart type), and the original owner’s manual․ However, due to its age, finding a unit with all original components can be challenging․
Many SR-18s are sold second-hand, potentially missing the manual․ Fortunately, digital copies are readily available online (see the Resources section)․ Some packages might also include MIDI cables, though these are not standard inclusions․
It’s crucial to verify the functionality of the power adapter and ensure the unit powers on correctly before purchase․ Inspect the pads for responsiveness and the LCD screen for clarity․ A well-maintained SR-18 will provide years of rhythmic enjoyment!
Getting Started: Initial Setup
Prepare for sonic exploration! Connect the power adapter and audio outputs, then familiarize yourself with the SR-18’s layout for seamless operation․
Powering On and Basic Connections
Initial Power-Up: Begin by connecting the included 9V DC power adapter to the SR-18’s power input and a suitable electrical outlet․ Ensure the voltage matches your region to prevent damage․ Once connected, the SR-18 will power on automatically – you should see the LCD screen illuminate․
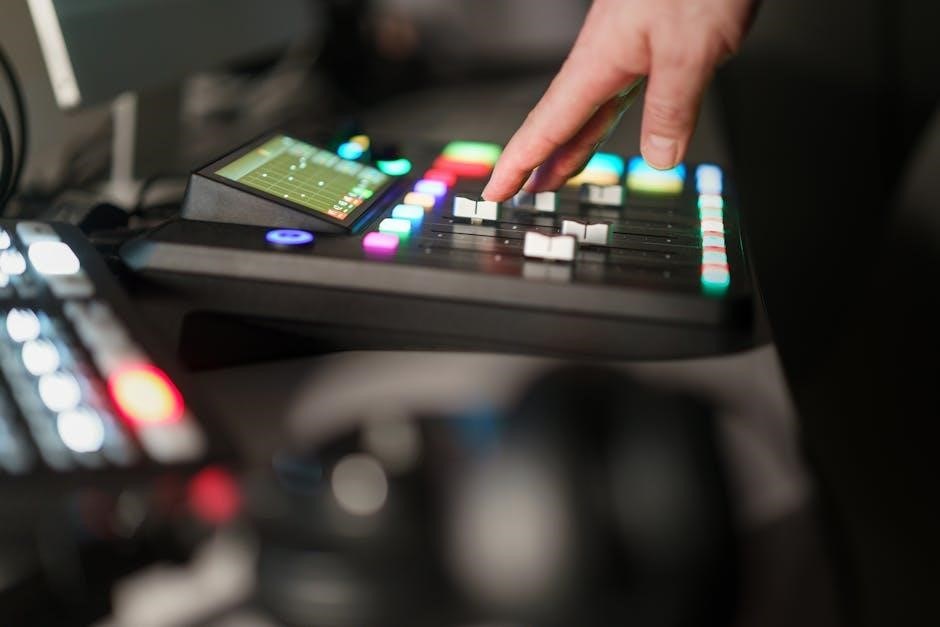
Audio Outputs: The SR-18 features stereo 1/4″ outputs․ Connect these outputs to a mixing console, audio interface, or amplified speakers using standard 1/4″ instrument cables․ For optimal sound quality, use balanced cables if your receiving device supports them․ Remember to adjust the output volume on both the SR-18 and your receiving device to avoid clipping or excessively low levels․
Headphone Connection: For private practice or monitoring, connect headphones to the SR-18’s headphone output․ Adjust the headphone volume control to a comfortable listening level․
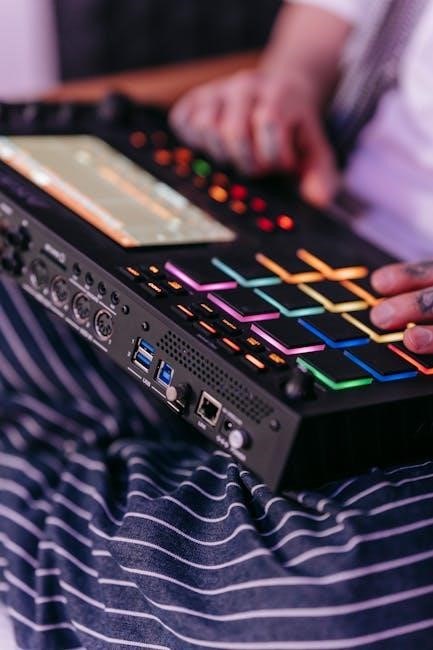
Understanding the SR-18 Interface – Front Panel Overview
Key Sections: The SR-18’s front panel is logically organized․ The central LCD screen displays parameters and editing information․ To the right are numeric keypad for direct value input and function buttons for navigating menus․ Below the screen are dedicated buttons for essential functions like Pattern, Kit, Song, and Write․
Parameter Controls: The Data Wheel allows for incremental adjustments of parameters․ Value Sliders provide real-time control over volume, pan, and other settings․ The Start/Stop button initiates and halts playback․ Finally, the Tempo control adjusts the overall speed of your patterns and songs․ Familiarizing yourself with these elements is crucial for efficient operation․
Navigating the LCD Screen and Menu System
Menu Access: Pressing the Menu button reveals the SR-18’s hierarchical menu structure․ Use the Up/Down arrow buttons to scroll through main menu options like Pattern Edit, Kit Edit, Song Mode, and System Settings․
Parameter Selection: Within each menu, the Data Wheel and arrow buttons select specific parameters․ The LCD screen displays the currently selected parameter and its value․ Pressing Enter confirms your selection․ Function buttons often provide quick access to related settings․ Remember to use the Exit button to return to the previous menu level․ Mastering this navigation is key to unlocking the SR-18’s full potential․
Programming Basic Drum Patterns
Unleash your creativity! Learn to build foundational rhythms using step sequencing and real-time recording, defining tempo and time signatures easily․
Step Sequencing: Creating a Simple Beat
Step sequencing is the cornerstone of precise drum pattern creation on the SR-18․ Begin by selecting a kit and a desired tempo․ Access the pattern edit mode, where a grid representing each step in a measure is displayed․ Each column corresponds to a different instrument – kick, snare, hi-hat, and so on․
To add a sound, simply press the corresponding step button․ The button will illuminate, indicating that the sound will play on that beat; Experiment with different combinations of steps to build a basic rhythm․ You can adjust the volume of each step individually for dynamic variation․ Utilize the ‘copy’ and ‘paste’ functions to quickly replicate sections of your pattern, speeding up the creation process․ Remember to save your pattern frequently!
Real-Time Recording: Capturing Live Performances
Real-time recording offers a more organic approach to beat creation on the SR-18․ Enter record mode and press play to start the sequencer․ Now, play your desired rhythm on the pads – the SR-18 will capture your performance directly into the pattern․ This method is ideal for capturing nuanced grooves and improvisational ideas․
Pay attention to timing; the SR-18 records precisely as you play․ You can ‘overdub’ onto existing patterns, adding layers and complexity․ Utilize the ‘quantize’ function to correct any timing imperfections after recording․ Remember to monitor the input levels to avoid clipping or distortion․ Real-time recording allows for a truly expressive and intuitive workflow․
Understanding Time Signatures and Tempo
Time signatures define the rhythmic structure of your patterns․ The SR-18 supports common time signatures like 4/4, 3/4, and 6/8, selectable via the menu․ This determines how many beats are in each measure and which note value receives one beat; Tempo, measured in beats per minute (BPM), controls the speed of the music․
Adjust the tempo using the dedicated buttons or the data wheel․ Experiment with different tempos to find the perfect feel for your track․ Understanding how time signatures and tempo interact is crucial for creating musically coherent patterns․ A slower tempo is good for ballads, while a faster tempo suits energetic dance tracks․
Advanced Programming Techniques
Elevate your compositions! Explore sophisticated methods for dynamic arrangements, intricate rhythms, and expressive performances using the SR-18’s powerful features․
Using Velocity and Accent
Adding Nuance to Your Beats: The Alesis SR-18 allows for expressive control over your drum patterns through velocity and accent settings․ Velocity determines how hard a note is “hit,” influencing its volume and, sometimes, its timbre․ Accent, a related feature, provides a dedicated way to emphasize specific beats within a pattern, creating rhythmic interest and groove․
To adjust velocity, you’ll typically input values during step sequencing or real-time recording․ Higher values equate to louder hits․ Experiment with varying velocities to simulate a more human feel, avoiding the robotic precision often associated with drum machines․ Accent settings are usually applied on a per-step basis, allowing you to highlight key beats like the snare on beats two and four; Mastering these techniques breathes life into your rhythms, transforming simple patterns into captivating grooves․
Pattern Chaining and Song Mode
Building Extended Arrangements: The SR-18’s Pattern Chaining and Song Mode functionalities enable you to construct complete musical arrangements beyond single, repeating patterns․ Pattern Chaining allows you to link multiple patterns together in a specific sequence, creating a more dynamic and evolving composition․ You define the order in which patterns play, and how many times each repeats, before transitioning to the next․
Song Mode takes this further, offering a dedicated environment for arranging chained patterns into a full song structure․ You can add intros, verses, choruses, and bridges, essentially building a complete track directly on the SR-18․ This is achieved by assigning patterns to specific song sections and defining their arrangement․ Experiment with different pattern combinations and song structures to unlock the SR-18’s full compositional potential․
Fill-Ins and Variations
Adding Dynamic Interest: Fill-ins and variations are crucial for preventing rhythmic monotony and injecting excitement into your drum patterns․ The SR-18 provides dedicated functions for creating and inserting these elements․ Fill-ins are short, often more complex patterns that are triggered at the end of a phrase or section, providing a transition to the next part․
Variations introduce subtle changes to existing patterns, such as adding or removing instruments, altering velocities, or introducing slight rhythmic shifts․ These can be triggered manually or programmed to occur automatically at specific points in a song․ Utilizing both fill-ins and variations effectively will elevate your drum programming, making it sound more natural and engaging․

Sound Editing and Customization
Shape your sonic palette! Explore the SR-18’s extensive sound editing capabilities, tailoring each drum element to perfectly match your musical vision and style․
Kit Selection and Modification
The SR-18 boasts a diverse library of pre-programmed kits, spanning numerous genres from rock and pop to electronic and hip-hop․ Accessing these kits is straightforward via the kit selection menu, allowing for quick experimentation and finding a starting point for your beats․ However, the true power lies in the SR-18’s modification capabilities․
Each kit comprises eight individual drum sounds, and each sound can be independently altered․ You can swap sounds between kit slots, effectively building entirely new kits from existing components․ Furthermore, parameters like pitch, decay, and pan can be adjusted to fine-tune each sound, creating unique tonal characteristics․ Don’t be afraid to experiment – layering sounds and pushing the boundaries of the SR-18’s sonic palette is highly encouraged!
Individual Sound Parameter Editing
Once a sound is selected within a kit, the SR-18 provides granular control over its sonic characteristics․ Key parameters include Pitch, allowing for tonal adjustments; Decay, controlling the length of the sound; Attack, shaping the initial transient; and Pan, positioning the sound within the stereo field․ Level adjusts the volume, while Tune offers further pitch refinement․
Navigating these parameters is done via the data entry wheel, allowing precise adjustments․ Experimenting with these settings dramatically alters the sound’s character․ For example, increasing decay creates a longer, more resonant sound, while shortening attack results in a sharper, more immediate response․ Mastering these parameters unlocks the SR-18’s full sonic potential, enabling truly customized drum sounds․
Using the SR-18’s Effects
The SR-18 incorporates a suite of effects to enhance and transform your drum sounds․ These include Reverb, adding spaciousness and depth; Chorus, creating a richer, thicker texture; and Delay, generating echoes and rhythmic repetitions․ A Flanger effect provides swirling, modulated tones, while Phaser offers a more subtle, sweeping effect․
Effect parameters, such as depth, rate, and feedback, are adjustable via the data entry wheel․ Applying effects globally to a kit or individually to specific sounds is possible․ Experimentation is key – subtle reverb can add realism, while extreme delay settings create unique textures․ Remember to save your modified kits to preserve your effect settings for future use․
Memory Management and Storage
Efficiently organize your creations! The SR-18 utilizes both RAM for temporary storage and ROM for permanent presets, ensuring ample space for your rhythmic ideas․
Saving and Loading Patterns and Kits
Preserving your sonic landscapes is crucial․ The Alesis SR-18 allows you to save both individual drum patterns and complete kits for later recall․ To save a pattern, navigate to the “Write” function via the menu system, select a memory location (numbered sequentially), and confirm the save․ Similarly, kits can be saved using the “Kit Write” function, choosing an available kit slot․
Loading is equally straightforward: use the “Read” function for patterns and “Kit Read” for kits, selecting the desired memory location․ Remember to regularly back up your data (if possible, depending on the model’s capabilities) to avoid losing your hard work․ The SR-18’s memory management is key to building extensive libraries of sounds and rhythms․
Using RAM and ROM Memory
Understanding the SR-18’s memory architecture is vital․ The unit utilizes both RAM (Random Access Memory) and ROM (Read-Only Memory)․ ROM contains the factory-preset patterns and kits – these are permanent and cannot be altered or deleted․ RAM, however, is where your custom creations reside․
Patterns and kits you save are stored in RAM․ Crucially, RAM is volatile, meaning it requires power to retain data․ Therefore, always power down the SR-18 correctly to avoid data loss․ The amount of RAM dictates how many custom patterns and kits you can store simultaneously․ Efficient memory management is essential for maximizing the SR-18’s creative potential․
Backing Up Your Data (if applicable)
The Alesis SR-18 does not feature direct data backup to a computer or external storage device․ Unlike modern devices, it lacks USB connectivity or SD card slots for this purpose․ Therefore, the primary method for preserving your work involves meticulously documenting your custom patterns and kits․
Carefully record all settings – kit names, individual sound parameters, pattern sequences, and tempo information – in a notebook or digital document․ This detailed record allows you to recreate your sounds if RAM data is lost due to power failure or improper shutdown․ Consider photographing the LCD screen displaying your patterns for a visual reference․

Connectivity and External Control
Expand your musical horizons! Explore the SR-18’s MIDI capabilities and external synchronization options for seamless integration with your existing setup and instruments․
MIDI Implementation: Connecting to Other Devices
The Alesis SR-18 boasts robust MIDI implementation, allowing for versatile connectivity with synthesizers, computers, and other MIDI-enabled gear․ Utilizing standard 5-pin MIDI connectors, the SR-18 can function as both a MIDI master and a MIDI slave․ As a master, it can synchronize and control external devices, sending clock signals and triggering notes․
Conversely, as a slave, the SR-18 can respond to incoming MIDI clock and program change messages, enabling external control over its patterns and sounds․ MIDI data can be transmitted and received on multiple channels, offering flexible routing options․ The SR-18 supports MIDI note messages for triggering sounds, control change messages for parameter adjustments, and system exclusive (SysEx) messages for data backup and transfer․ Proper MIDI channel assignment is crucial for seamless communication․
Triggering External Sounds with the SR-18
The Alesis SR-18 can effectively trigger sounds from external sound modules or synthesizers via MIDI․ By configuring the SR-18’s MIDI output to transmit note messages on a specific channel, you can instruct external devices to play their sounds in sync with your drum patterns․ Ensure your external sound module is set to receive MIDI on the corresponding channel․
Experiment with different MIDI note assignments to map the SR-18’s drum pads to various sounds on your external gear․ This opens up possibilities for layering the SR-18’s internal sounds with external instruments, creating richer and more complex sonic textures․ Remember to adjust the velocity sensitivity on both the SR-18 and the external module for optimal dynamic response․
Syncing with External Clocks
The SR-18 offers synchronization capabilities, allowing it to play in time with external devices acting as MIDI clock masters․ Access the SR-18’s global settings to select “External” as the clock source․ This instructs the SR-18 to derive its tempo from incoming MIDI clock signals․
Ensure your external device is transmitting MIDI clock data on the appropriate MIDI channel․ Precise synchronization is crucial for seamless integration with other instruments or sequencers․ You may need to adjust the SR-18’s clock offset parameter to compensate for any latency or timing discrepancies․ Experiment with these settings to achieve tight and reliable synchronization․
Troubleshooting Common Issues
Encountering problems? This section provides solutions for typical SR-18 difficulties, ensuring a smooth workflow and minimizing frustrating interruptions during creation․
No Sound Output
Problem: The SR-18 isn’t producing any sound, despite appearing to be powered on and functioning correctly․ This is a common issue with several potential causes․ First, verify all cable connections – ensure the output cables are securely plugged into both the SR-18 and your mixing console, amplifier, or headphones․
Check the volume levels on both the SR-18 itself (using the master volume knob) and your receiving device․ A muted or low volume setting will obviously result in no audible output․ Next, examine the output routing within the SR-18’s menu system; confirm that the correct output is selected․
Test with headphones directly connected to the SR-18 to isolate whether the issue lies with the drum machine or your external audio setup․ Finally, ensure a kit is loaded and a pattern is playing – a blank pattern won’t produce any sound!
LCD Screen Problems
Problem: The SR-18’s LCD screen is displaying distorted characters, is completely blank, or has dimmed significantly․ Several factors can contribute to LCD issues․ Initially, check the contrast setting using the dedicated contrast knob; adjusting this may restore visibility․ If the screen is blank, verify the SR-18 is receiving power and is fully powered on․
Try resetting the unit by powering it off and on again․ A temporary glitch might be the cause․ If the display is distorted, examine the LCD cable connection internally (requires opening the unit – proceed with caution!)․
Avoid exposing the SR-18 to extreme temperatures or direct sunlight, as this can damage the LCD․ If the problem persists after these steps, the LCD itself may be faulty and require professional repair or replacement․
MIDI Connectivity Issues
Problem: The SR-18 isn’t communicating with your MIDI controller, sequencer, or computer․ First, ensure the MIDI cable is securely connected to both the SR-18’s MIDI OUT/IN ports and the receiving device․ Verify MIDI settings within the SR-18’s menu – confirm the correct MIDI channel is selected for both transmit and receive․
Check your receiving device’s MIDI input settings to ensure it’s listening on the same channel as the SR-18․ Test with a different MIDI cable to rule out a faulty cable․ If using a USB MIDI interface, confirm the correct drivers are installed on your computer․
Try a different MIDI port on your interface․ If issues persist, consult the manuals for both the SR-18 and your MIDI device for compatibility information․
Resources and Further Learning
Expand your SR-18 expertise! Discover official support, vibrant online communities, and helpful video tutorials to master this powerful drum machine․
Official Alesis SR-18 Manual Download
Access the definitive resource for your SR-18! The official Alesis SR-18 manual provides an exhaustive exploration of every feature, function, and parameter․ This comprehensive document is invaluable for both beginners and experienced users seeking a deeper understanding of the drum machine’s capabilities․
You can download the SR-18 manual directly from the Alesis website․ It’s typically available as a PDF file, ensuring easy access and portability․ The manual covers everything from initial setup and basic operation to advanced programming techniques and troubleshooting․ It includes detailed explanations, illustrative diagrams, and helpful examples to guide you through every step․ Having this manual readily available will significantly enhance your SR-18 experience and unlock its full creative potential․ Find the link in the Alesis support section!
Online Communities and Forums
Expand your SR-18 knowledge with fellow enthusiasts! Numerous online communities and forums are dedicated to the Alesis SR-18, offering a wealth of shared experience and support․ These platforms are excellent resources for asking questions, sharing tips, and discovering new techniques․
Popular forums often feature dedicated threads for the SR-18, where users discuss everything from programming challenges to sound customization․ You can find valuable insights, sample patterns, and even user-created kits․ Websites like Reddit (search for relevant subreddits) and dedicated music production forums are great starting points․ Engaging with these communities can accelerate your learning curve and inspire your creativity․ Don’t hesitate to contribute your own knowledge and help others!
Tutorial Videos and Resources
Visualize your learning with helpful video tutorials! Beyond the official manual, a vibrant collection of online video resources can significantly enhance your understanding of the Alesis SR-18․ Platforms like YouTube host numerous tutorials covering everything from basic operation to advanced programming techniques․
Search for “Alesis SR-18 tutorial” to discover a range of content, including step-by-step guides, sound design demonstrations, and performance examples․ Many creators offer focused lessons on specific features, like pattern chaining or MIDI implementation․ These visual aids can be incredibly helpful for grasping complex concepts․ Additionally, explore websites offering downloadable sound packs and pattern libraries to expand your sonic palette and inspire new ideas․